
Stock Assembly
Materials Needed:
1 - 3/4" X 6" X ?" Left over from trigger/receiver board
1" Thin walled pvc & 1" pvc connector
Drywall screws
Drill, Scroll or sabre saw, rotozip tool, Dremel tool
Printed Stock template : Stock (Right click & Save then print)
Instructions:
Print the template for the stock then trace it onto your board 2 times. After cutting out the pieces, use your wood glue and screws to attatch the 2 sides of the stock together, making sure they are square. The next step is to find a cutting bit that will be big enough to make the hole for your stock connector to fit into. I used 1" pvc with 1" connectors. To make the stock removeable you will need to make the hole in the front of the stock fit the 1" pvc. I used a 1" hole saw, but had to sand the hole to fit the pipe. See picture below for hole placement.
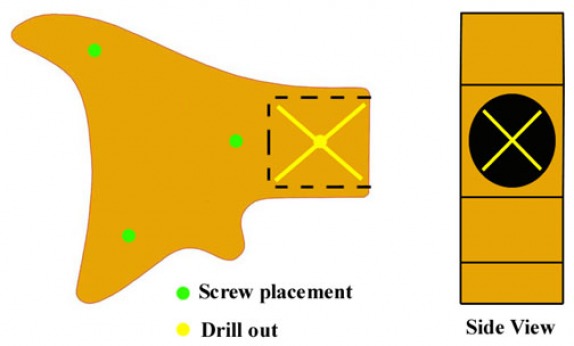
Once you have drilled the holes and test fitted all pipes and connectors for the receiver and the stock, they must be secured with glue and screws. Leave enough of the 1" pvc sticking out of the stock and receiver to trim back after putting the connector on. Don't trim too much or the pieces wont fit right. Just take a little off at a time to get the right fit to the connector. See the photo for details.
Barrel Assembly
Materials Needed:
16" x 1" thin walled pvc
3 - 1" pvc connectors (one having a raised center)
20" X 1/2" thick wall pvc
2 - 1/2" pvc connectors
Drill & Saw
Printed barrel templates : Barrel (Right click & Save then print)
Instructions:
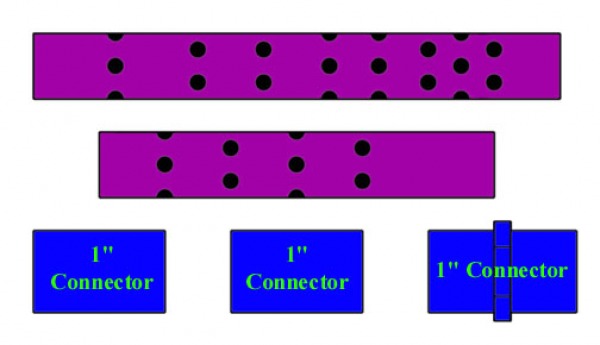
Cut your 1" pvc into two pieces 10" & 6". Print then wrap the templates around the 1" pvc, and tape into place. Using a small bit drill pilot holes in the center of each black dot, take your time with this. I then used a larger bit (7/16") to drill out the main holes. BE CAREFUL and don't drill into your hand!!! Take some time and clean up the holes with sandpaper or a utility knife. You should end up with something like this:
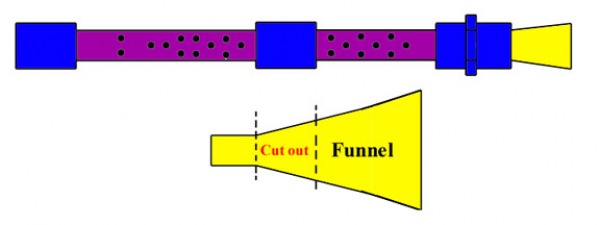
I then took my pieces an test fitted them, during the test fit I took a measurement for the 1/2" pvc that will go inside the 1" pvc. When putting the 1/2" connectors on be sure to wrap them with tape to secure them to the inside of the 1" pvc. The tape keeps the 1/2" pvc from banging around. Before assembling the inner pipe be sure to paint it, then put it in. To make the tapered cone on the end of the barrel I used a long black funnel. It's not going to be easy getting the funnel to fit the 1/2" pvc. I cut mine, then trimmed till it fit. At this point you should be able to put the entire barrel together, see below:
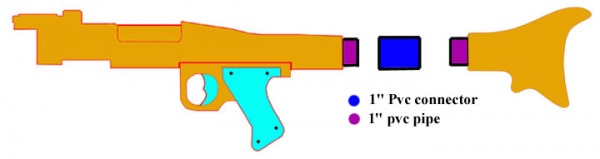
You should be able to secure the rear 1" pvc connector to the front of the receiver. Once it is in place, put a screw through the top of the receiver into the part of the connector that won't hold the barrel. I would also use some kind of glue to add strength to the connection. You have completed the main body of the gun. This is what you should have so far:

